Guide walkthrough
Start reading here
This is the main article body, where the page shifts from summary cards into the actual workflow and decision-making notes.
On this page
Key terms for this guide
These glossary pages cover the ideas and platform language most likely to matter as you work through this guide.
Breakout tools need both location and participation
A breakout indicator is much more useful when it tells you where expansion is happening and whether the move has real activity behind it. Without one of those pieces, the chart can get noisy fast.
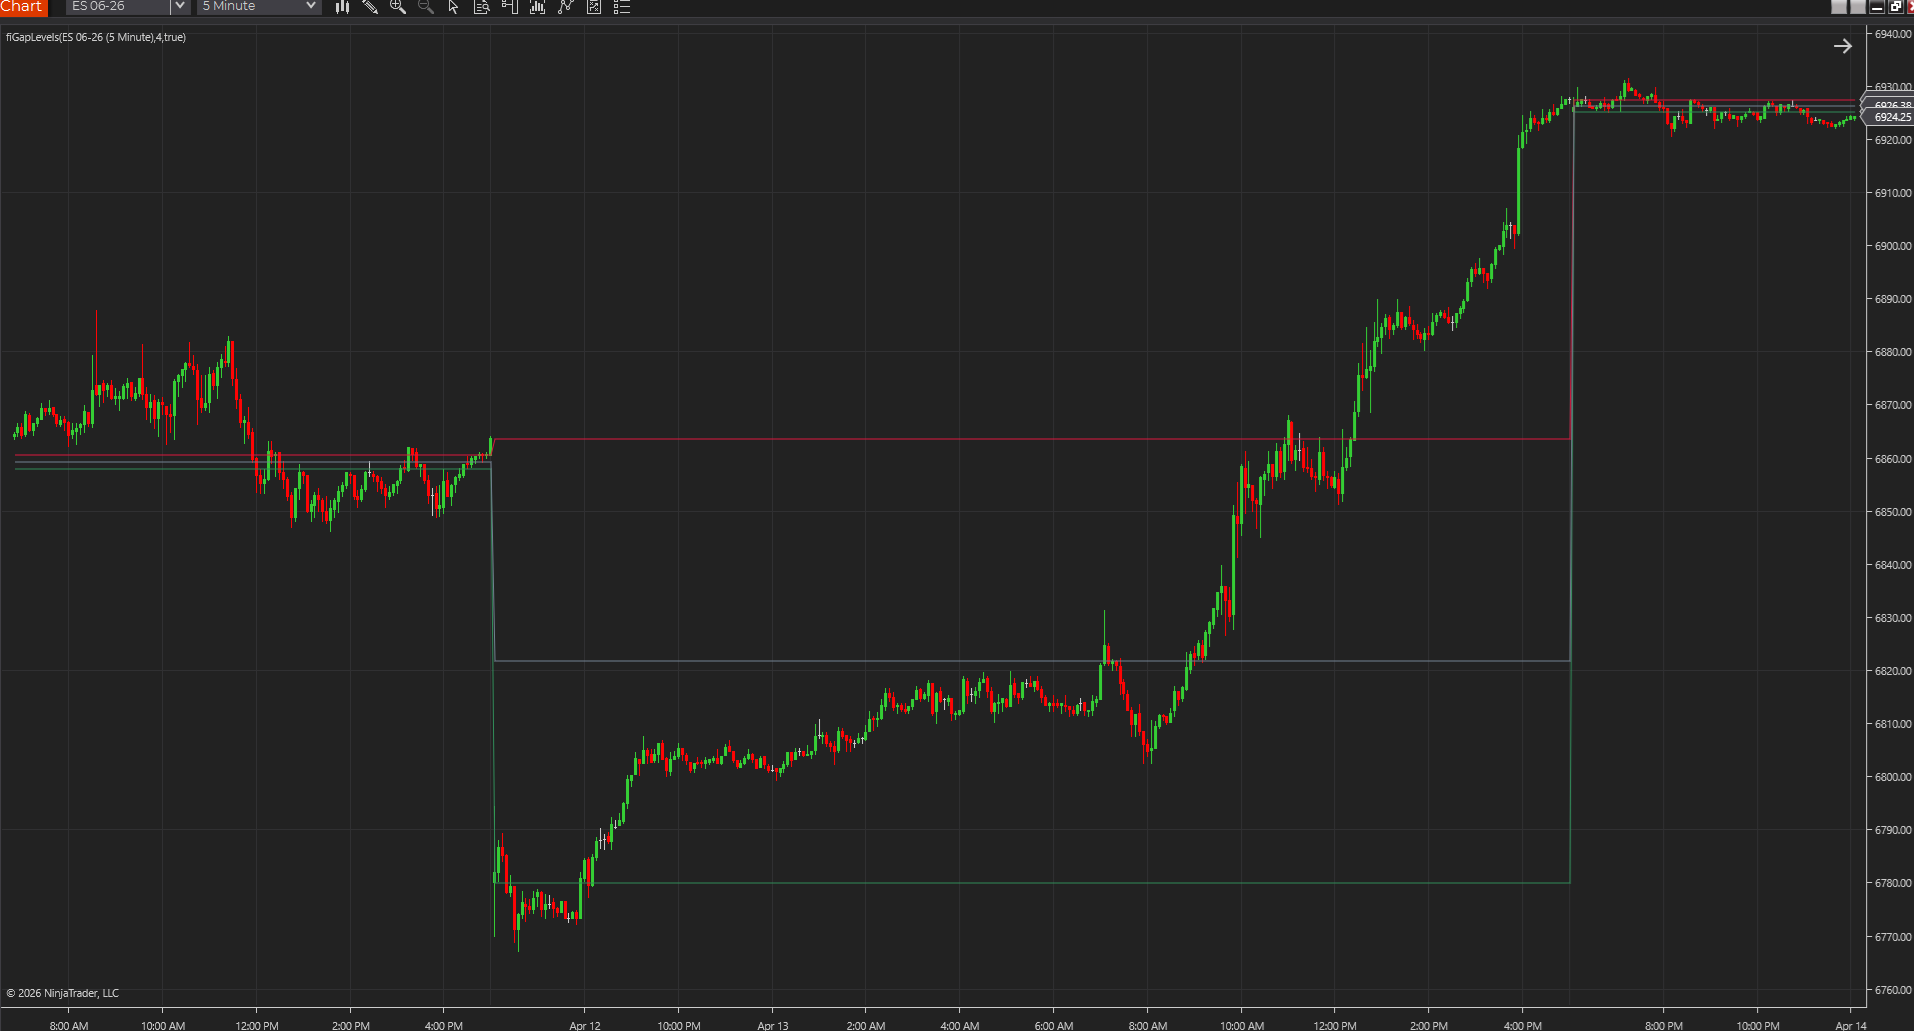
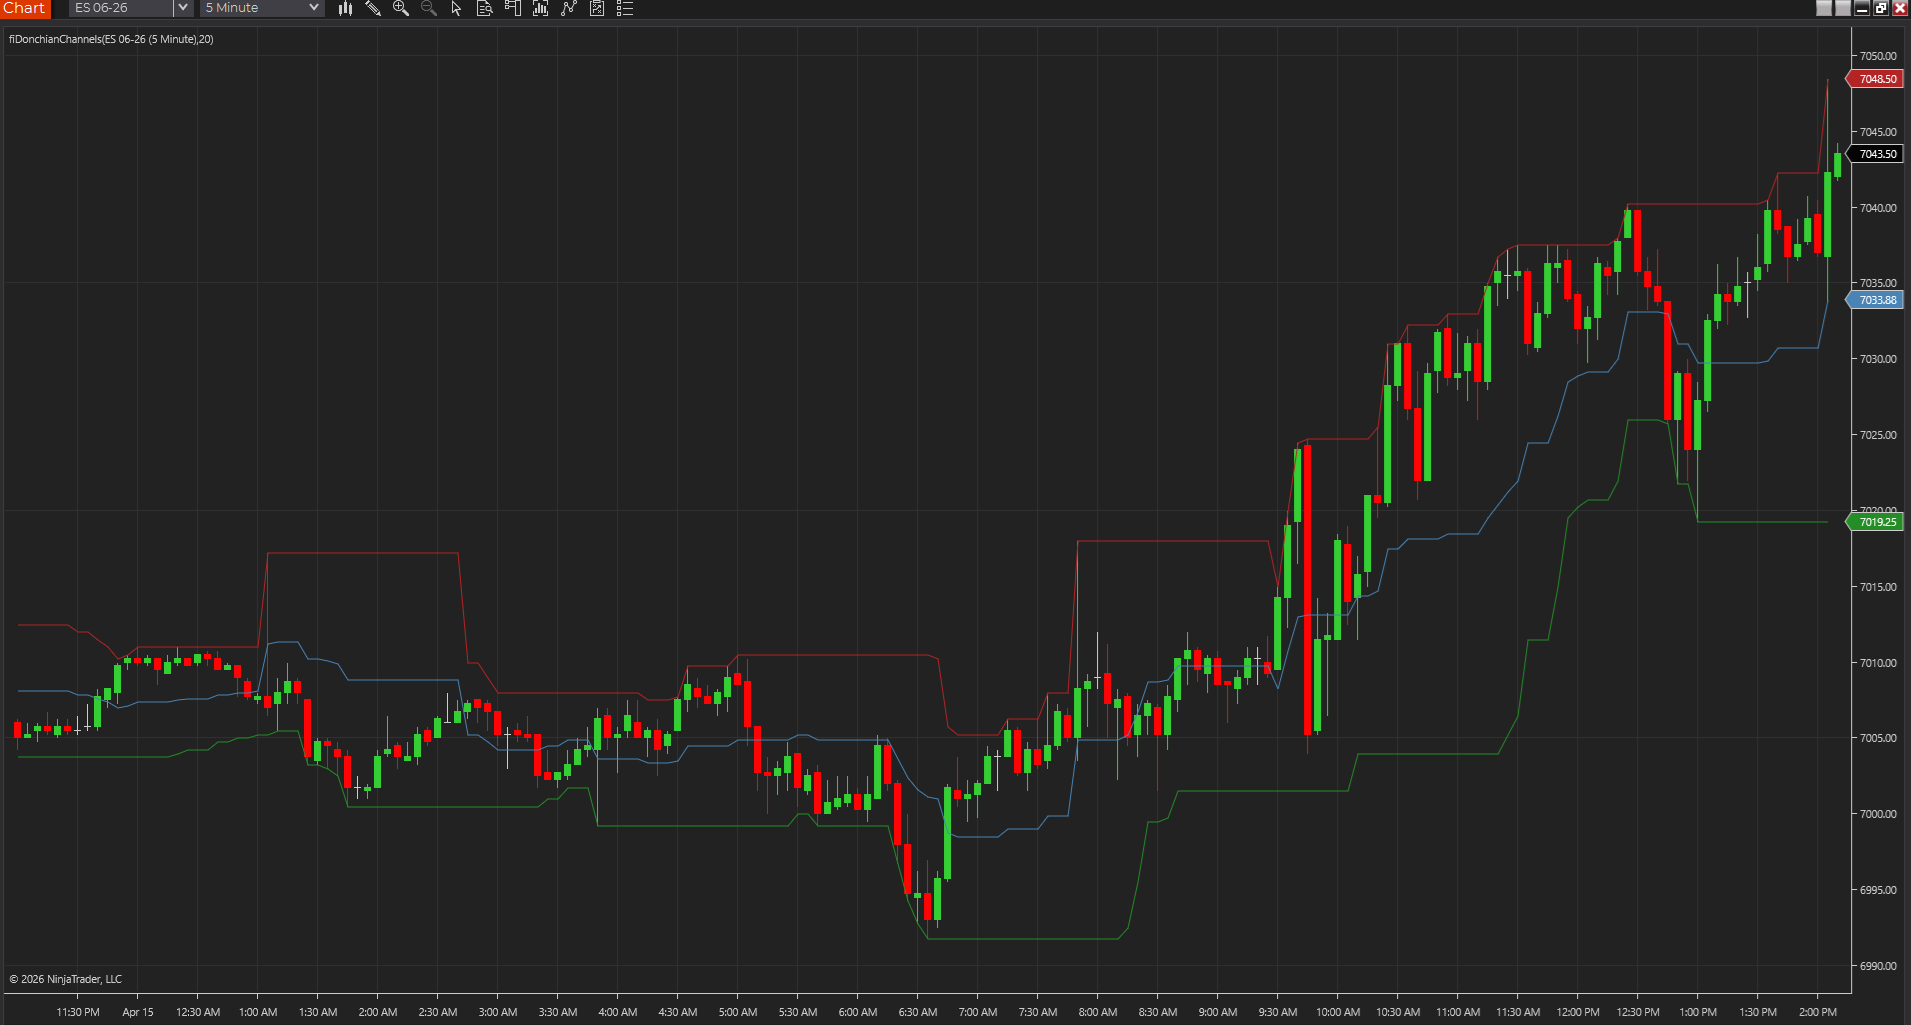
Choose the breakout frame first
Opening-range tools are session-open specific, while Donchian-style channels are better for rolling range breaks later in the day. The choice depends on when the breakout question matters.
Use participation to filter the obvious fakes
Volume spikes and bar-speed changes will not eliminate every failed breakout, but they can help distinguish between real expansion and routine probing.
Best next reads
These pages pick up the questions most readers usually have next, so you do not have to back out and start a fresh search.