Guide walkthrough
Start reading here
This is the main article body, where the page shifts from summary cards into the actual workflow and decision-making notes.
On this page
Key terms for this guide
These glossary pages cover the ideas and platform language most likely to matter as you work through this guide.
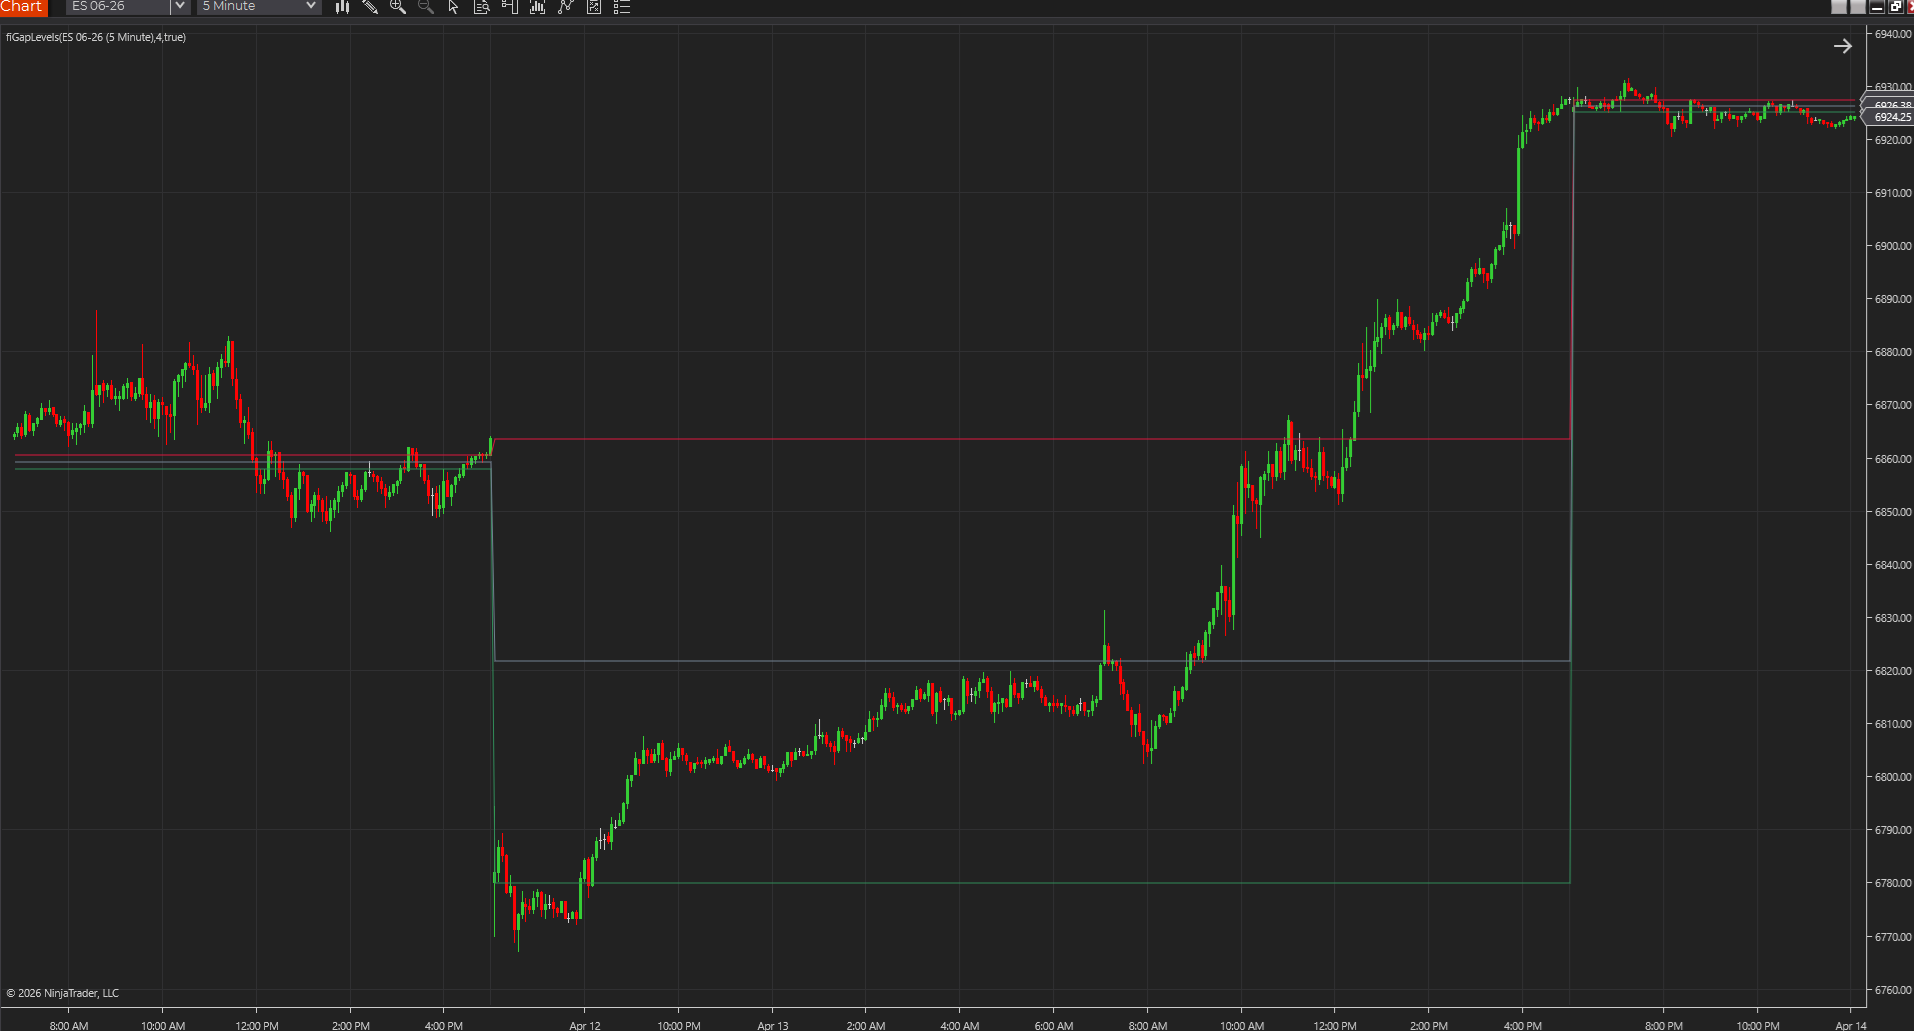
The gap matters because the open moved away from prior value
Gap levels show the price space between the prior close and the new session open. That gives you a simple map for whether the market is filling, rejecting, or accepting away from that zone.
Use the midpoint as balance context
The gap midpoint can help frame whether the session is treating the gap like a full rejection, a balanced test, or a partial fill that still leaves the opening move intact.
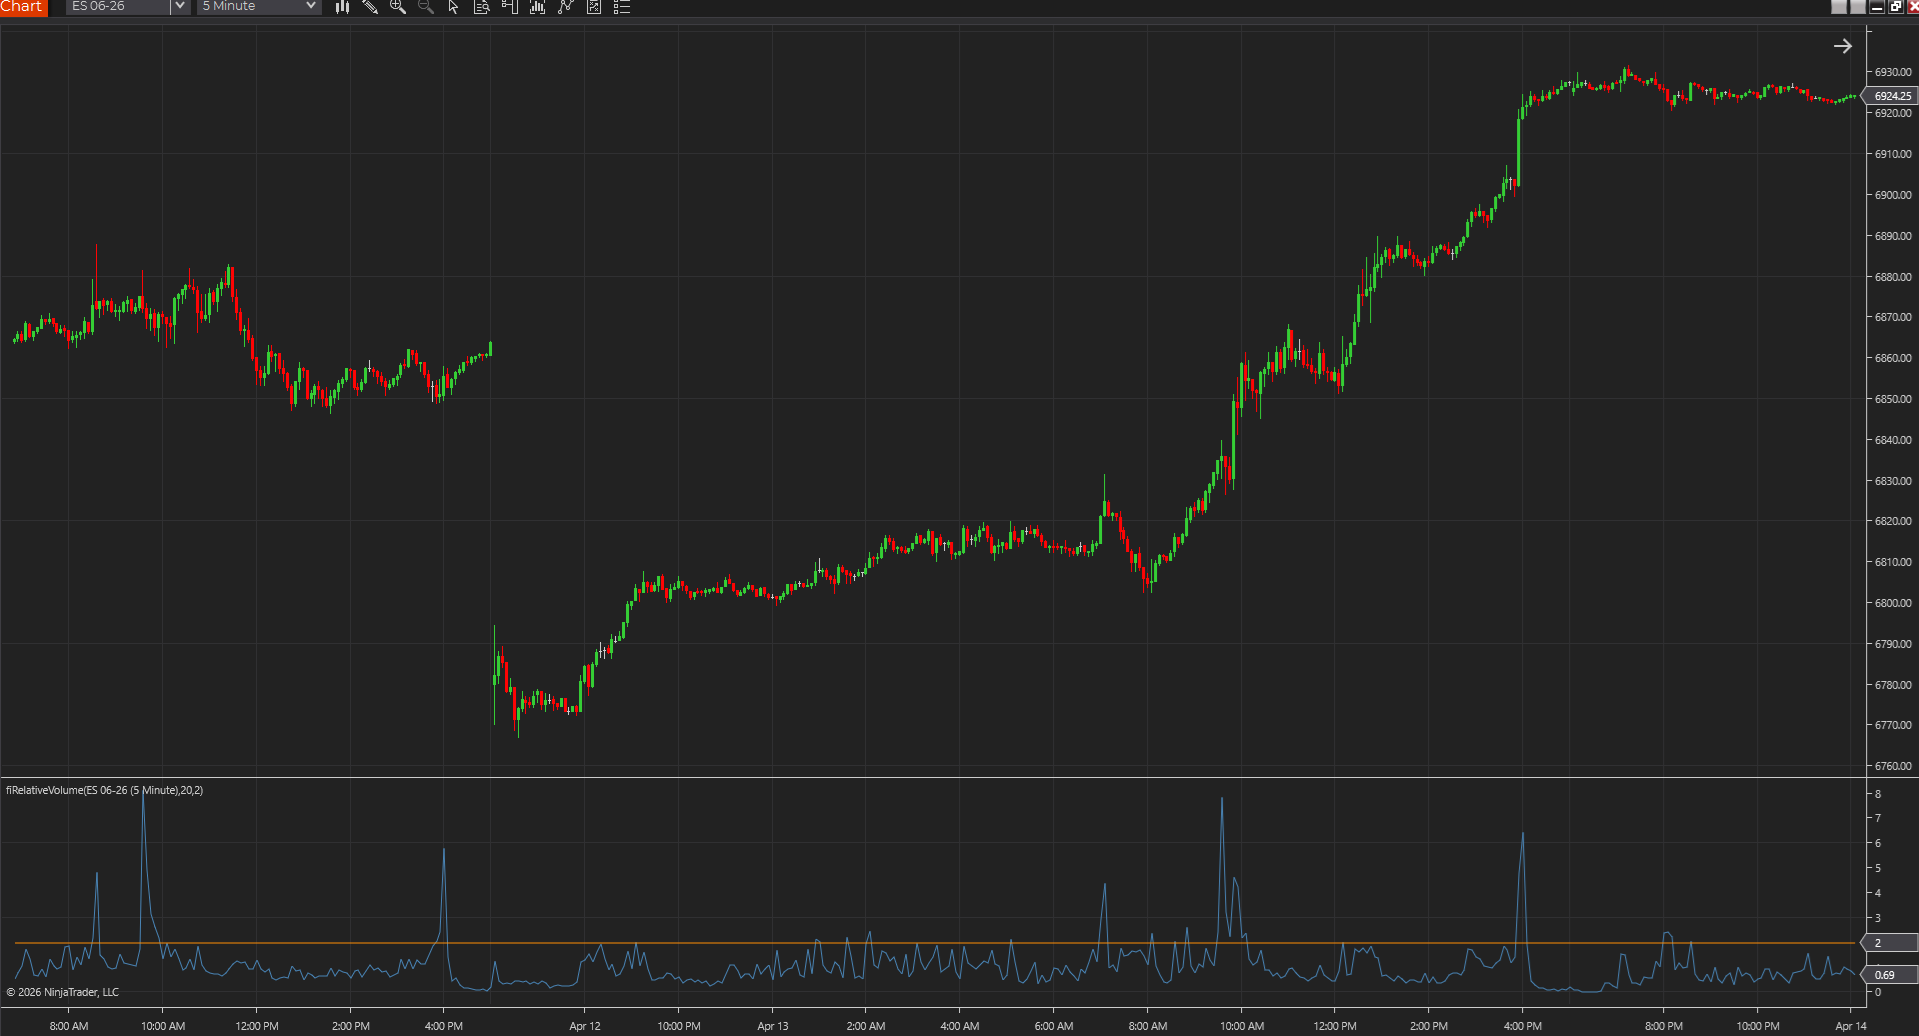
Pair the gap with participation
Gap behavior gets more useful when you also know whether the fill or rejection is happening with real activity. That is where relative volume or volume spikes help.
Best next reads
These pages pick up the questions most readers usually have next, so you do not have to back out and start a fresh search.